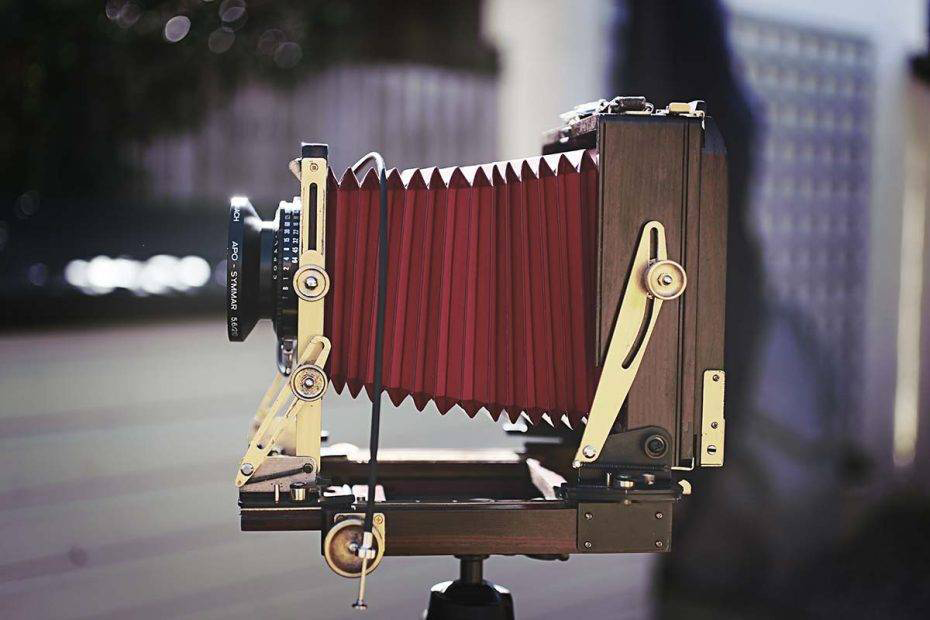
It might look archaic, but a large format camera can produce fantastic images with the equivalent of well over 100 mp.
Learning how to use a large format camera can seem a bit daunting if you are used to using a modern digital camera. There is no automation to help you, and the layout and variety of controls is very different from what most photographers are used to . In reality, there is nothing inherently difficult about making a photograph with a large format camera. You just have to be a bit more patient and a bit more methodical. The main differences are in the ergonomics and speed of operation, the principles of photography stay the same, whatever the camera.
Large format requires quite a lot of equipment in addition to the camera, so it’s a good idea to have a checklist of all things you need, especially if like me, you share some of that equipment with other set ups. It’s easy to forget something like your loupe or dust blower, and it’s a real pain if you do.
Basic Large Format Checklist by Tobias Key Photography
- Camera
- Lenses as Required
- Tripod
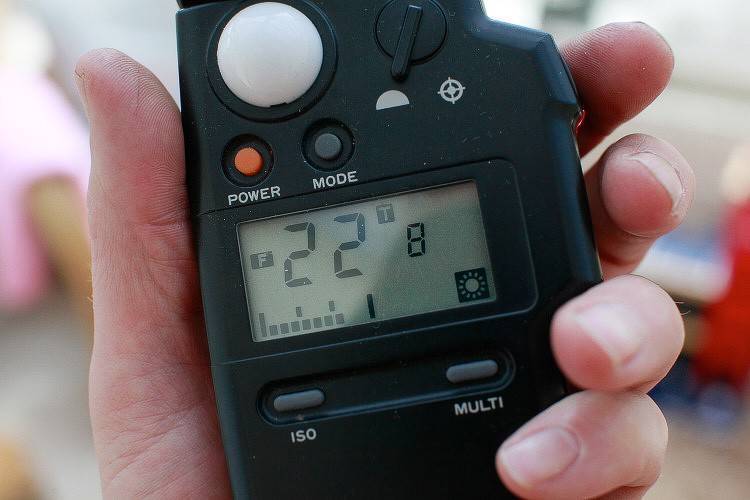
- Light Meter
- Magnifying Loupe
- Cable Release
- Film Holders
- Dark Cloth
- Blower brush and Lens Cloth
- Notepad and Pen
- Multi Tool
You can keep your list in your camera bag so you can get into the habit of checking everything before you go. I keep mine on my smartphone, along with an app for depth of field calculation, and one that works as a light meter. A handy back up in case I forget my handheld meter.
Money Saving Tips
Premade dark cloths can be quite expensive, so a way to make one cheaply is to take a black T shirt and attach it to the camera with the neck hole.
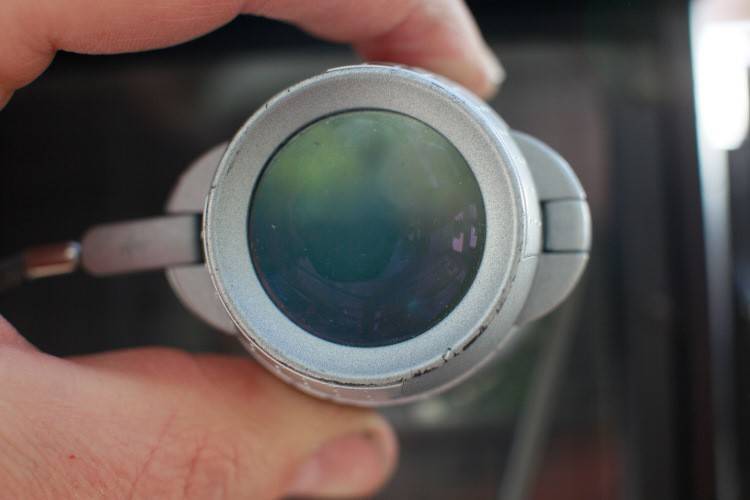
If you don’t have a loupe a pair of strong supermarket reading glasses can work well and are surprisingly good quality
Camera Controls
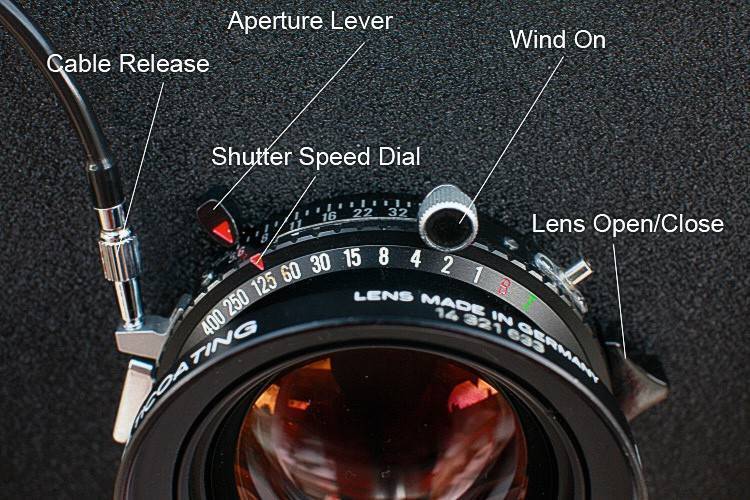
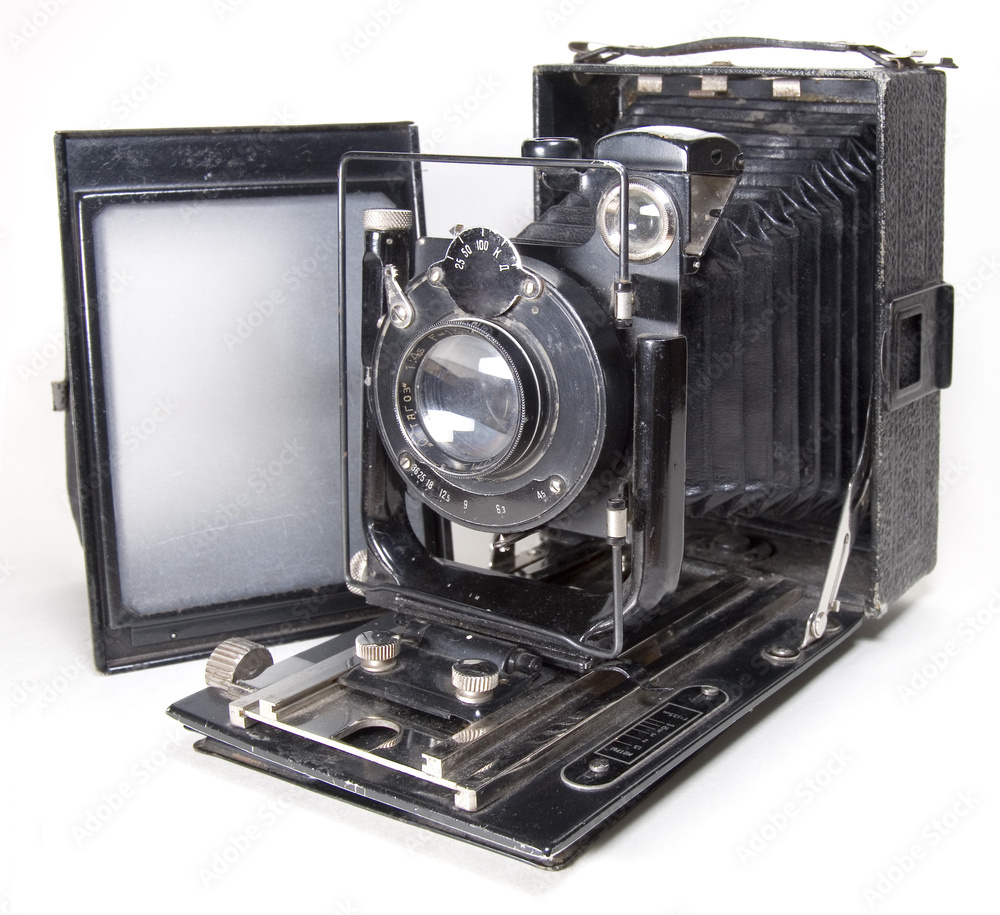
Your main camera controls are all on the shutter that the lens is fitted to. This is a modern Copal No.1 shutter, but most shutters made over the last 50 years have a similar layout. Never adjust the shutter speed after cocking the shutter!!
Your only two exposure controls are shutter speed and aperture, ISO is governed by your film choice, and set on your light meter. Your film holders should be labelled by film type and speed for reference.
Making your First Large Format Photograph – Step by Step.
Step 1. Setting up your tripod
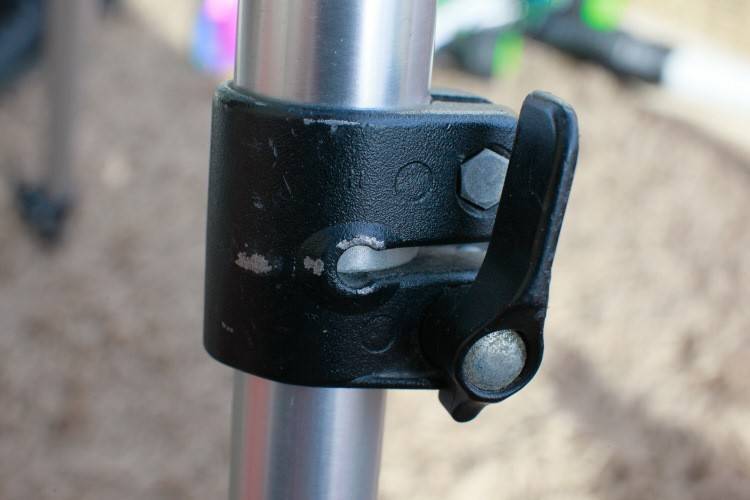
Set up your tripod, making sure all the legs are locked in place. Fix your camera to the tripod, and attach a lens. Fully open up the aperture on the lens. Screw in your cable release to the shutter.
Large format photography is all about detail and resolution. Make sure that you have a stable tripod to shoot with. Nothing is more frustrating than having sharpness-robbing vibration ruin your shots.
Step 2. Level your Camera
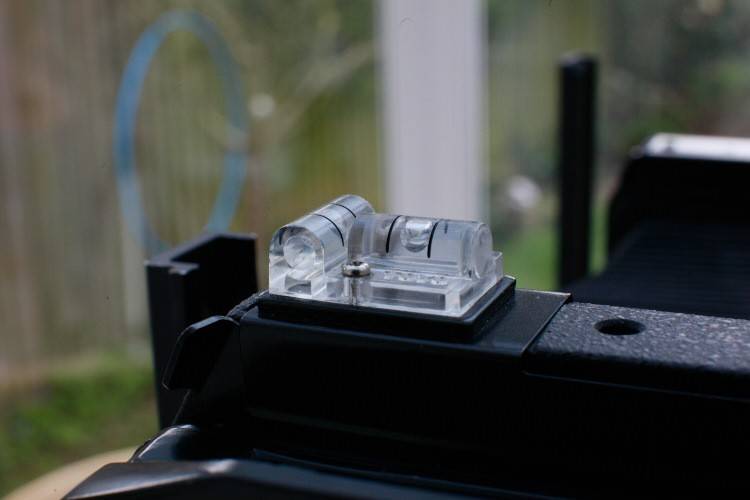
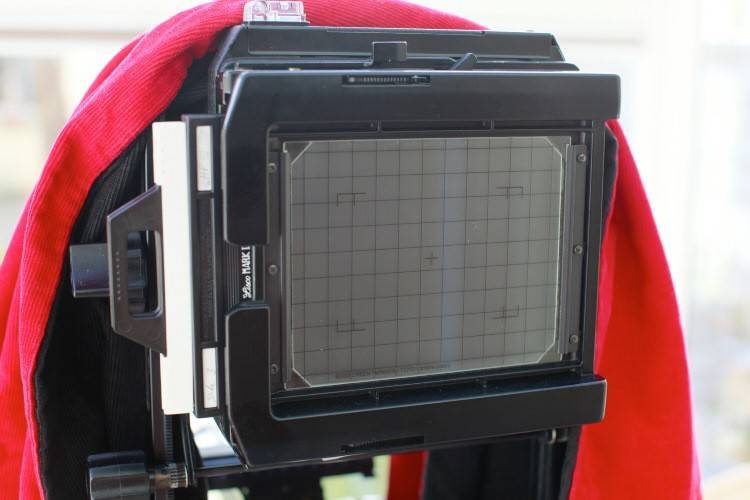
Using the spirit levels on the camera to make sure it is perfectly level – vertically and horizontally.
It’s best to start off with a straight and level camera, making sure that all tilts, swings and shifts are also zeroed. Many cameras will have detents on the main camera controls so the zeroed settings will just gently click into place. If the camera doesn’t have detents on some controls, there are usually little arrows to line up instead. 4×5 has very shallow depth of field, so an inadvertently tilted or swung standard, or a camera that is not level can give you strange focus issues. It’s much easier to start with everything parallel and perpendicular. Also make sure that once you’ve zeroed the camera you lock off all the controls. That way you won’t get tilts or swings moving while you focus or vice-versa.
Step 3. Initial Focus and Composition.
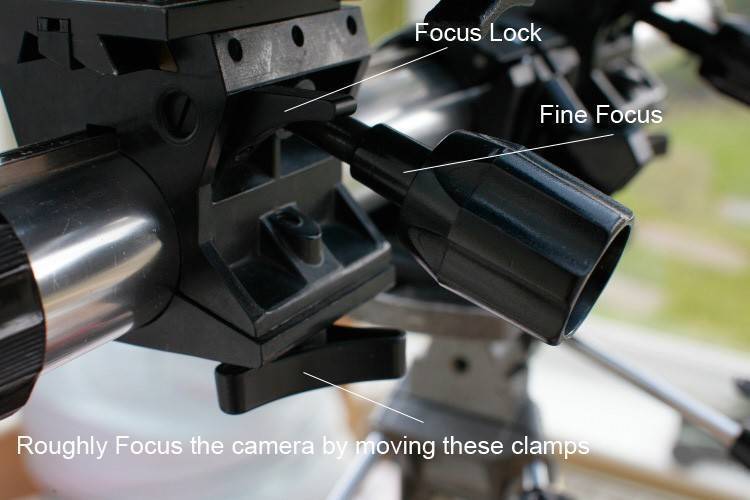
Use your dark cloth and focus the camera by eye. You don’t have to use a magnifier until later. Then begin to compose the picture using the ground glass.
Remember, you can use rise, fall or shifts to refine your composition. You don’t have to move the tripod unless you need to change your point of view drastically.
Step 4: Fine Focus and Check Depth of Field
Once you have set up your camera either focus on your subject, or if you are photographing a landscape a good staring point is to focus about one third of the way into the scene. Now is the time to stop down the lens. The normal working apertures on 4×5″ are between f16 and f32, this may seem small compared to full frame but diffraction in 4×5 isn’t really noticeable until f64.
It is as this point you would use tilts and swings to maximize depth of field if stopping down by itself isn’t enough. Tilts and swings are not that difficult, but would take up too much space to deal with them here. Follow this link if you want to know more about camera movements. For now let’s assume you don’t have to use them. Once you are happy with focus check the corners of your image to make sure there is nothing creeping into the edge of frame. One of the beauties of a large format camera is you can compose your images very precisely, so make sure you take advantage of it.
Step 5. Lock Down the Camera
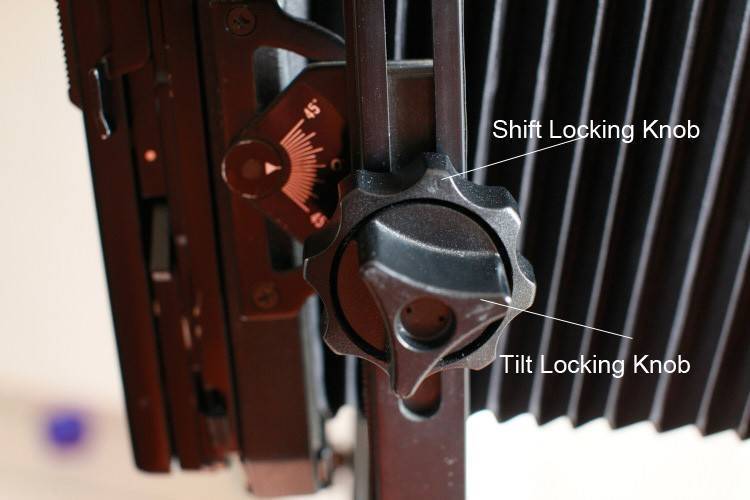
Once you are happy with your focus and composition, lock down all the controls on your camera. Ideally, you should lock each control after you have finished adjusting it. That way you don’t inadvertently move any controls while adjusting something else. In practice, you may find yourself adjusting a couple of things at once, like tilt and focus, and will lock both down together once you have finished.
Step 6. Final Meter Reading. Set Aperture and Shutter. Close Lens.
Take a meter reading and make your final shutter speed and aperture selection. I tend to do this quite late on because I live in the UK and the light can vary quite a lot with shifting cloud cover. Remember you can damage the shutter if you change the shutter speed when it is wound on, so always check before selecting your shutter speed. Once you have done this close the shutter so the camera is light tight and ready to receive a film holder. It is a good habit to test fire the shutter a few times at this point just to warm up the mechanism and check everything is working.
7. Insert Film Holder. Remove Dark Slide. Trip the Shutter.
Take out you film holder and remove any surface dust with your blower. You can also tap the bottom of your holder onto the palm of your hand to dislodge any dust on the film. It should fall to the bottom of the holder. Insert your film holder gently. Your camera should be locked down but it’s best to err on the side of caution in case something moves. Double check that the lens is closed and the camera is light tight. Remove the dark slide while keeping your thumb on the back of the spring back so you don’t open it inadvertently. You are now ready to expose the film.
Use the cable release to trip the shutter in one smooth stroke. As an extra precaution some photographers stand slightly away from the camera to avoid causing any vibrations. If you are a portrait photographer sometimes standing behind the camera can help you judge the correct moment of exposure. Once you have tripped the shutter carefully reinsert the dark slide with the black (exposed) tab facing out. Put the holder somewhere safe and then check the ground glass to see that focus hasn’t shifted. At this point many photographers make another duplicate exposure for safety. That of course is up to you.
Congratulations, you have just made your first large format photograph!
Top 10 Digital Photography Tips
Whether you are a beginner or more experienced with photography, here are some of our favorite tips that will help you improve your photography!


1. Use the Rule of Thirds

This rule helps you take eye-catching pictures by using one of the most effective rules of composition.
If you want to take pictures that have a “wow” factor built in them, the Rule of Thirds is the composition secret you need to take advantage of!
To use the rule of thirds, imagine four lines, two lying horizontally across the image and two vertical creating nine even squares. Some images will look best with the focal point in the center square, but placing the subject off-center at one of the intersecting points of the imaginary lines will often create a more aesthetically composed photograph.
When a photograph is composed using the rule of thirds the eyes will wander the frame. A picture composed using the rule of thirds is usually more pleasing to the eye.
2. Avoid Camera Shake

Camera shake or blur is something that can plague any photographer and here are some ways to avoid it.
First, you need to learn how to hold your camera correctly; use both hands, one around the body and one around the lens and hold the camera close to your body for support.
Also, for handheld shooting, make sure that you are using a shutter speed that is appropriate for your lens’ focal length. If your shutter speed is too slow, any unintentional movement of the camera will result in your entire photograph coming out blurry.
The rule of thumb is not to shoot at a shutter speed that is slower than your focal length to minimize this problem:
1 / Focal Length (in mm) = Minimum Shutter Speed (in seconds)
So, as an example, if you’re using a 100mm lens, then your shutter speed should be no lower than 1/100th of a second.
Use a tripod or monopod whenever possible.
Are you confused by any of the terminology? Do you want to easily control your camera and finally get rid of the confusion about focal length, aperture, shutter speed, and other settings?
3. Learn to use the Exposure Triangle

To get your photos looking their best, you need to master the three basics: Aperture, Shutter Speed and ISO.
You also need to understand the relationships between these three controls. When you adjust one of them, you would usually have to consider at least one of the others, to get the desired results.
Using Auto Mode takes care of these controls, but you pay the price of not getting your photos to look the way you wanted them, and often disappointing.
4. Use a Polarizing Filter

If you can only buy one filter for your lens, make it a polarizer.
The recommended type of polarizer is circular because these allow your camera to use TTL (through the lens) metering such as auto exposure.
This filter helps reduce reflections from water as well as metal and glass; it improves the colors of the sky and foliage and will help give your photos the WOW factor. It will do all that while protecting your lens. There’s no reason why you can’t leave it on for all of your photography.
5. Create a Sense of Depth

When photographing landscapes, it helps to create a sense of depth, in other words, make the viewer feel like they are there.
Use a wide-angle lens for a panoramic view and a small aperture of f/16 or smaller to keep the foreground and background sharp. Placing an object or person in the foreground helps give a sense of scale and emphasizes how far away the distance is.
Use a tripod if possible, as a small aperture usually requires a slower shutter speed.
6. Use Simple Backgrounds

The simple approach is usually the best in digital photography, and you have to decide what needs to be in the shot, while not including anything that is a distraction.
If possible, choose a plain background – in other words, neutral colors and simple patterns. You want the eye to be drawn to the focal point of the image rather than a patch of color or an odd building in the background. This is especially vital in a shot where the model is placed off-center.
7. Don’t Use Flash Indoors

Flash can look harsh and unnatural especially for indoor portraits. Therefore, there are various ways you can take an image indoors without resorting to flash.
First, push the ISO up – usually ISO 800 to 1600 will make a big difference for the shutter speed you can choose. Use the widest aperture possible – this way more light will reach the sensor, and you will have a nice blurred background. Using a tripod or an I.S. (Image Stabilization) lens is also a great way to avoid blur.
If you absolutely must use flash, then use a flash with a head you can rotate, and point the light to the ceiling at an angle.
8. Choose the Right ISO

The ISO setting determines how sensitive your camera is to light and also how fine the grain of your image.
The ISO we choose depends on the situation – when it’s dark we need to push the ISO up to a higher number, say anything from 400 – 3200 as this will make the camera more sensitive to light, and then we can avoid blurring.
On sunny days we can choose ISO 100 or the Auto setting as we have more light to work with.
9. Pan to Create Motion

If you want to capture a subject in motion, then use the panning technique. To do this, choose a shutter speed around two steps lower than necessary – so for 1/250, we’d choose 1/60. Keep your camera on the subject with your finger halfway down on the shutter to lock the focus and when ready, take the photo, remembering to follow them as they move.
Use a tripod or monopod if possible to avoid camera shake and get clear movement lines.
10. Experiment with Shutter Speed


Don’t be afraid to play with the shutter speed to create some interesting effects.
When taking a nighttime shot, use a tripod and try shooting with the shutter speed set at 4 seconds. You will see that the movement of the object is captured along with some light trails.
If you choose a faster shutter speed of say 1/250th of a second, the trails will not be as long or bright; instead, you will freeze the action.
Try shooting other compositions with moving objects or backgrounds such as waves on a beach, crowds of people walking, cars commuting, with different shutter speeds to either capture blurred movement or snapshots that freeze everything sharply in time.
Whenever using slow shutter speeds to blur movement, it is critical that the camera is stabilized to eliminate camera shake. We recommend the AmazonBasics 60-inch Tripod as an excellent entry-level option for taking photographs with slow shutter speeds.
BONUS TIP: Invest More In Learning (and Less on Gear)

If you’re thinking about spending thousands on new cameras and lenses, think twice.
People often end up disappointed that their shiny new toys aren’t producing that “wow” factor they were expecting.
You can take stunning photos that you’ll be proud of, even with a modest digital camera fitted with its standard zoom lens. But you need to have a solid understanding of the basics.
That’s why it is critical to master composition and light, before spending anything on new gear.
“Photography is by nature a documentary art.”
August Sander